Finally Getting Back on Track

At 12:30 pm today the countdown officially ended: sunny skies, high temp around 55, and a slow day at work. The stars aligned to allow me to bring out my new training tool...

That's right, I'm finally doing something I've always wanted to get into. And it came about on a whim.

My '07 Scattante has been having some frame issues so I've been shopping around for possible replacement options. This has taken me to Craigslist and eBay countless times in the past several months. As I was browsing frame after frame, I came across a listing for a track frame with a current bid of $30. After considering it for a few minutes, I put in a max bid of $70 and thought nothing of it. A couple days later I received an email from eBay notifying me that I won the auction at exactly $70. I was floored. 

You will notice that it is missing a few things, like wheels, a seat, and even a chain. With further searching on eBay I found a set of wheels that fit my needs: tough, somewhat aero (Deep-V rims), and around $200.

That left me with just a few other parts to purchase, which arrived from Amazon over the coming week: a chain, cogs of various sizes, a cog lockring, and a Park Tool Head-Gear lockring wrench.

I had other parts on-hand from previous replacements or stock-ups: Schwalbe Durano S tires, Specialized tubes, a Forte Pro SLX seat, and Shimano PD-R540 SPD-SL pedals.

And then I had to go to the bike store to buy some rim tape. Duh!

Now that I have a track bike assembled and ready to go... I became a hipster and started wearing weird clothes and drinking PBR, right?

Um... No.

Only 5 miles from my house is the track that hosted the cycling events for the 1990 Goodwill Games, many regional Olympic trials, and several National Championships, the Marymoor Velodrome. It is a fabulous outdoor, 400m concrete oval bicycle track with 25 degree banked turns. Most tracks are shorter, which means banking up to 45 degrees. 

Panorama of the Marymoor Velodrome, Redmond, WAThe key thing here is "outdoor". That 25 degree banking can be downright dangerous in the wet. With that in mind, the only thing I needed was a dry track. This requires a dry/sunny day. In late winter in the Seattle area. Suuuuuure. It only took about a week of waiting.

My new track bike at the Marymoor VelodromeI came down for a long lunch at the track and took in a few turns. There were only a couple people there, including Rob McD, a track racer I know from work. He had some very encouraging words but in the end I was just there to show everyone how slow and out of shape I have become in the last 18 months. 

The circus had indeed come to town. No, really. That big white tent behind me is for Cavalia. Think Cirque du Soleil but with horses. One of these days I'll actually go to one of their shows. Anyway...

I did an even 40 laps of interval training: sprint for 1-2 laps, rest for 2-3 laps, repeat. OK, I did have to stop a few times to adjust various things on my bike like stem position, handlebar height, etc., since this was my first time on this bike.

In the end I didn't kill myself. I didn't even embarrass myself, although I tried a few times. Note to self: FIXED GEAR BIKES do not have a freewheel. Trying to stop the pedals at 25 MPH is a BAD idea.

It was a great day. I can't say enough good things about this track. And I'll be back. My next opportunity appears to be Monday, only 3 days away!

On race night the atmosphere around the track is electric. The competition is fierce and the speeds are high.

Marymoor Velodrome during the 2012 FSA Grand Prix

One of our favorite track events is the "Marymoor Crawl" where they have everyone "race" from turn 4 to the start/finish line for up to 2-3 minutes, at which point they ring the bell and everyone does a 1-lap sprint for a $100 prize. The catch? If you put your foot down or cross the start/finish line before the bell, you are eliminated. It is crazy and looks a little something like this-

Doing it on the cheap - Redeaux!

Disclaimer: This post contains referral affiliate links. No other paid compensation or sponsorship.

In looking at my website stats, my "Doing it on the cheap" post is #1. There is no other post that even comes close, even my Cycle Oregon page has less hits by a 10x margin. And now I present an updated and expanded version of...

Triathlons: How to be a Triathlete on a budget.

Triathlons are not for the faint of heart and, apparently, not for the thin of wallet. 

"So Triathlon is the new golf?" I was so flabbergasted that I didn't quite know what to say. This could not possibly be true but there was the data in black and white-

"According to a study initiated by USA Triathlon, the average triathlete is a married 38-year-old with an income of $126,000. Forty-four percent have kids living at home; 60% are male. They spend in excess of $4,000 annually on bike gear, athletic footwear, race fees and nutritional supplements. Nearly half have traveled more than 500 miles for a race."

-Natalie Zmuda, Advertising Age

$4000 a year on gear, race fees, and food? PER YEAR? Seriously? If it doesn't turn out to be a fad then there is significant money to be made marketing/selling gear to triathletes in the coming years. 

...Unless that triatlete is me. I may be squarely in the demographic quoted above but I spend NO WHERE NEAR that amount of money on my craft.

Is it possible to be a triathlete and do it on a shoe-string budget? My answer: ABSOLUTELY!

Let's break it down into the main categories mentioned in the article above and see how you can do it without breaking the bank. To be fair to all you lady triathletes out there I called upon an old friend, Valerie, who finished her rookie race in 2011 and did it for just-over $200!

Finding the Best Deals

TIMING IS EVERYTHING: Best advice I can give you - plan what you need NOW and start researching and window shopping. Notice I didn't say buying? That comes later. If you wait until the last minute to find what you need you will either spend WAY too much (i.e. list price) or find yourself loaded down with worthless gear that doesn't fit or meet your needs.

Once you know what you are looking for, you can take your time and wait for the right sale.

The best time of year to buy gear is the last month of the season and the 2 months following (August-October in North America). That's when shops are clearing out the current year's merchandise, prepping for Inter-bike, and getting ready to stock up on the latest products. If you can settle for the previous year's clothing or gear you can save some serious dough.

Deal Websites: My favorite site lately has been Steep & Cheap but you can also find great deals on Amazon and many others. Also look for "deal of the day" on sites like Western Bike WorksREI, and Competitive Cyclist. These sites are great but if you don't know what you are looking for they are useless. Do your footwork first and they are much more valuable. 

Clearance Sales: The REI seasonal clearance sales, the clearance section of just about any shopping website, and even Performance Bike and Bike Nashbar are a great place to find hidden gems. Case in point: My bike commute shoes are a pair of size 49 Canondale Roam shoes. I found them on a fluke on Bike Nashbar for nearly 75% off (less than $30). 

The Clearance Rack: When I go shopping at any store (clothes, electronics, and especially sporting goods) the first place I go is the clearance rack/section. Some of my best finds have been at REI, the Nike Factory store, and, yes, Target (amazing low prices on basic workout clothes such as base layers for running). Go to ALL of your local bike stores (LBS) and check out their clearance rack/table. You will be surprised what you can find marked down by 80% (like every set of gloves or glasses I have ever worn). 

Race/Training Clothing

I put this category first because it crosses boundaries with the different disciplines on race day and, most of the time, while training as well. 

Tri shorts: A good pair of tri shorts will serve you well on the bike and still be comfortable on the run. I prefer the Pearl Izumi Tri Shorts, men's model of course. List price: $55. If you are going to skimp on something, for heaven's sake don't skimp on your shorts. Do it on the...

Tri top: This is where there is the most flexibility. For short races a normal bike jersey will do but for the longer races you need something that won't chafe your armpits or other sensitive upper-body areas. Once again, Pearl Izumi Tri Top (Sleeveless) is a good choice. List price: $55.

Tri Suit: The even cheaper way to go is to combine the jersey and shorts into a tri suit. The Pearl Izumi Tri Suit lists for $99, $10 cheaper than the shorts and top combination. 

I hate to sound like a broken record for Pearl Izumi but they seem to have a lot of clothes that fit me (size XXL). There are other options out there but they are harder to find and often more expensive. 

That about covers race day clothing but race day itself is less than 1% of the total time you will spend all year in your sport. The rest is spent training. While training, especially on single-sport days, you can wear something a little more tailored for the current sport. If I'm going to spend 120 minutes on the bike doing a long ride I would much rather be wearing bike-specific shorts. There is a lot of flexibility there. I will cover each individually below.

Swim exit to T1, Beaver Lake Tri 2010

Swim exit to T1, Beaver Lake Tri 2010

Swim Gear

Race Swim Suit: See Tri shorts/suits above. For race day there really is no substitute. In big races (i.e. Ironman events) there is an enclosed changing area where you can change into a tri-suit if you desire but not so in shorter/local races. I actually saw a couple of women changing in the transition area of T1 during a race. One would hold up a big towel around the other while she changed, then they would switch. Their T1 times must have been somewhere around 10 minutes.

Training Swim Suit: This is where you can get ultra-cheap. Any suit that fits for swimming, and allows for freedom of movement, should do the trick. I use a cheap pair of swim trunks while Val uses a womens model Speedo suit that she has had for years. 

Goggles: Talk about cheap! You can get goggles for as little as $5. I use the Speedo Futura Biofuse Goggle which I picked up from a local sport retailer for $10. Just as with any equipment it has to fit. 

Swim Cap: Since these are provided with your race this is one of the few no-cost items on the list (well, almost no-cost, since race entries aren't exactly free). I didn't think much about using a swim cap during training swims until I took a lifeguard class. Those bright-colored swim caps make it MUCH easier to find a lost swimmer underwater, especially when visibility is limited.

Beaver Lake Tri 2010 Swim Start

Beaver Lake Tri 2010 Swim Start

Wet suit: This is by far the highest priced item in the swim section. For race day wet suits can be rented in most major cities for anywhere from $40-70, depending on type and length of rental. If you live in an area where you must train using a wet suit (like I do) then purchasing one may be a better deal. These can cost anywhere from $100 to as much as you want to spend. Second hand wetsuits are plentiful around the end of the season via Ebay, Craigslist, or even your favorite retailer (think rentals models clearance). I bought my wetsuit for $150 from Chainlove.com, a 2XU sleeveless wetsuit

Chrissy Wellington and her Cervelo P2C

Chrissy Wellington and her Cervelo P2C

Bikes and Bike Equipment

The Bike: There are no other pieces of equipment in your list that will meet the cost of the bike. You can use an existing bike (like Val did), buy a used bike for under $100, or spend as much money as you want (the sky is the limit in some cases). Now, before you run out and spend more than the value of your car on a real tri-bike, remember that even Chrissy Wellington won her first Ironman Kona on a Drop Bars with clip-on aero bars. Of course that bike was a Cervelo P2C tricked out with full Dura-ace groupo and an HED wheelset. Even Lance said, "It's not about the bike." The best place to start is a bike that fits your budget and your body.

A word about bike sizing: Any good LBS (local bike shop) should be able to size your bike to you. If you are going to spend hundreds of hours training, commuting, and/or racing on a bike in an aero position a fit is more important than you may realize: as with other repetitive strain injuries, the right positioning and posture can prevent countless hours of pain and thousands of dollars. A post-purchase bike fit is covered by most insurance companies to make sure your bike is adjusted to fit your specific body needs. 

Bike Accessories: After you buy a helmet (required at all races in the US) the basic item you need is some type of hydration (i.e. water bottle and mount). The cheapest are only a few dollars. Other essential items are bike shoes, with compatible pedals, and perhaps a bike computer. My friend Val went old-school with a set of clip-pedals for under $20, which is what I would consider the bare minimum for any race. Without clips or a clipless pedal/shoe combination you cannot capture the energy of upward/backward pedal strokes and will waste precious muscle energy on the down-stroke, which is the same primary muscle group you use when you run. 

Bike Computer: There are a TON of toys you add to your bike, including GPS devices with mapping and directions (I use an old Garmin Edge 1000 or Garmin Vivoactive 3), but why not just use your smartphone? If you have an iPhone or Android phone then you have all that functionality built-in now. Go download a free fitness app and you will have speed and GPS data. You can even buy a basic Bluetooth heart rate strap to your iPhone for under $50 or simply use your smart watch (such as my Garmin Vivoactive 3).

Repair Kit: Some racers, especially in the elite class, really go light on their repair kits or even skip it completely. If you, like me, are one those "finish at all costs" type of athletes then a good repair kit is essential but it doesn't have to cost much at all. A basic flat kit, an extra tube, and a CO2 pump will weigh only a pound or 2 and can cost less than $20. 

Bike-specific Clothing (Training): Jerseys and shorts can be a very personal item in terms of fit, use, and style but one thing is for sure: a good pair of bike shorts goes a long way. Or at least it can help you go a long way with lower body impact than a cheaper pair of shorts. Best advice I heard early on: buy a really cheap jersey and use the money you saved to buy the best shorts you can afford. Your nether-regions will thank you later (as opposed to screaming).

Beaver Lake Tri 2010, Run segment

Beaver Lake Tri 2010, Run segment

Running Gear

Running Shoes: Along with tri shorts, running footwear is another area where you should be careful about getting overly cheap. Properly fit footwear is the first requirement but it must also fit your running style. A quick visit to a podiatrist or running store for a gait analysis (i.e. how do you run?) will help determine the best type of shoe. I have been wearing Asics Gel Kayano shoes for the past several years and LOVE the feel, although I have been experimenting with minimalist footwear with some success. 

Once you know what works best for you there is nothing to stop you from buying online. My favorite source for shoes has been Ebay. Search for your specific make/model/size of shoe and you can find screaming deals for as much as 50-70% off, especially if it is "last year's model". 

Run-specific Clothing (Training): This is where I get super cheap. My running shorts, shirts, and base layers come from either the clearance rack at Target or my local sporting good store. Total cost: $15 per set. 

Race Fees

This one can get a little ridiculous if you are not careful. In 2009 I completed 3 races, 2 sprints and an Olympic distance. My total race fees for the year: $222 ($72, 75, and 75 respectively). 

I prefer smaller, more local events than the larger M-Dot events (i.e. World Triathlon Corporation, or WTC, owners of the Ironman brand). While very well run the M-Dot events support upwards of several thousand racers and cost a lot more than the local non-profit events I usually participate in- 

  • Ironman 70.3 (US prices): $250-300 (depends on registration date)

  • Ironman 140.6 (US prices): $600-700

Nutrition

Gels, Protein Shakes, jelly beans, etc: This one is like arguing religion or pizza toppings (very contentious in some cases). No matter your preference in this category you can find numerous vendors our there and, if you shop smart, you can find good deals. Watch the clearance sales and bulk buy web sites for the best deals. I usually spend less than $50/year on nutrition. Here are a few of my favorites…

Nuun Sport: Electrolyte Drink Tablets

Nuun Sport: Electrolyte Drink Tablets

Honey Stinger Waffles! A favorite of mine.

Honey Stinger Waffles! A favorite of mine.

Clif Blocks - Energy Chews

Clif Blocks - Energy Chews

A warning about clearance "nutrition": Watch the expiration date. I bought some Honey Stinger Waffles recently (my new favorite food for distance riding) and found they expired in 6 months after purchase (hence the low cost). Don't stock up big if they won't last.

Summary

How much did I spend in 2011? (my last big race year prior to 2014)

Race day gear (per year, as spent in 2011)

  • Race clothing: $0 (bought my Tri-shorts in 2010 for $30, no new jerseys in 2010)

  • Swim gear: $15 (new goggles, wetsuit was purchased in 2010 for $150)

  • Bike gear: $150 (new chain, rear cassette, and front/rear tires)

  • Run gear: $65 (new shoes)

  • Nutrition: $50 (new gels)

  • Race fees: $75 (only 1 race in 2011)

My 2011 total: $355 (i.e. nowhere near the $4000 number above).

How much did Valerie spend on her first tri in 2011? (An off-road Tri in eastern WA state)

  • Race clothing: $0 (borrowed Tri-shorts for the race, but have since purchased a Tri-suit at TJ Maxx)

  • Swim gear: $0 (used existing goggles, no wetsuit)

  • Bike gear: $20 (new toe-clip pedals)

  • Run gear: $80 (new shoes)

  • Nutrition: $50 (new gels, should last into 2012)

  • Race fees: $60 (only 1 race in 2011)

2011 Total: $210

Was this a typical race year for me? Well, almost. My race fees would have been about $150 higher (i.e. 2 races) if I was able to better coordinate my schedule. My typical race schedule is for at least 3 races, 1 of them a half-iron distance (i.e. 70.3 but it's not an M-dot event). My race fees should be closer to $300.

The Race Rookie Year

What if you are new to triathlon and looking to complete your rookie race? Let's assume you are starting from absolute zero and do a little math...

  • Race clothing: $100 (Tri-suit)

  • Swim gear: $20 (cheap swim suit and googles)

  • Bike gear: $600 (bike (possibly used), clipless pedals, shoes, shorts, jersey)

  • Run gear: $100 (running shoes, shorts, shirt, base layer)

  • Nutrition: $50

  • Electronics: $50 (basic heart rate monitor)

  • Race fees: $100 (typical for a local Sprint/Olympic-distance race, not an M-Dot event)

  • Total: $1020

This assumes you have no gear whatsoever, which is not true for most athletes. 

The moral of the story: you can EASILY spend less than $1000/year on triathlon gear and race fees if you are careful. I will grant that my goals are not as lofty as some. If you are shooting for 1 or more Ironman races this year (140.6) then your budget may be a bit larger. Spending that much time in training puts a lot of stress on your body and clothing which wears it out faster and sometimes requires you to buy the more expensive clothes in the first place.

But for "normal guys" like me (hence the website name) it is very easy to be a tight-wad and a cheap-skate. Just don't tell my wife or she may cut my gear budget even further.

}B^)

Quick Update and Detour...

A quick update on my status and a slight detour...

Last spring my son Patrick decided he wanted to try mountain biking. So we packed up our bikes and headed off to a local park to try our hand at single-track. At this point I didn't own a mountain bike so I was riding my commuter bike, a Specialized TriCross Disc. It didn't end well for me, in a way. After less than half a mile of riding in the mud and muck, we turned around. My 1.6" tires were not built for this type of riding. And Patrick beat me back to the parking lot by a sizable margin. The grin on his face was incredible.

So I've been shopping for a new bike. My injuries and other priorities earlier in the year put that on hold but last week I pulled the trigger. I plan to use this bike for fun rides with my son, bike camping, and our big ride across the state (someday). 

2014 Specialized RockHopper 29, my newest ride.

So, the detour... Over on my other website, RideAcrossWashington.com, I wrote up a blog post  detailing my shopping experience and my first real trail ride with my son. It was an amazing day.

Patrick at Soaring Eagle Park in Sammamish, WA

Red-Tac Island Hopper Ride Report

Most married men complain about their in-laws, specifically their Mother-in-law (i.e. the mother of their wife). Rather than go into the vagaries of standard social convention, I will end it all by saying that when I married my wife I hit the "in-law lottery." My wife's parents are two of the coolest, most laid-back, accommodating people I have ever met. They are VERY hard working, every waking minute is spent working, even though they "retired" almost 15 years ago when they sold their business. They even come to my races to cheer me on!

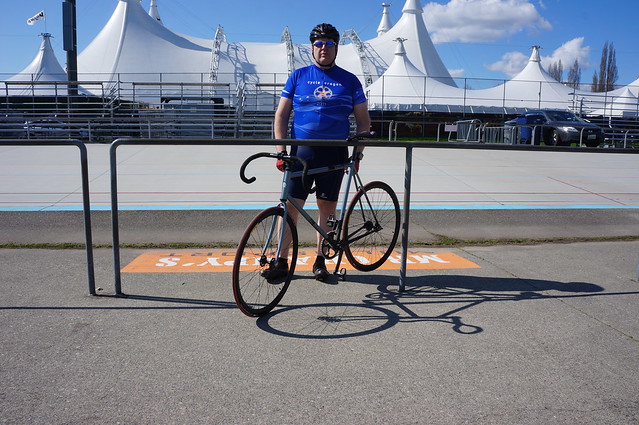
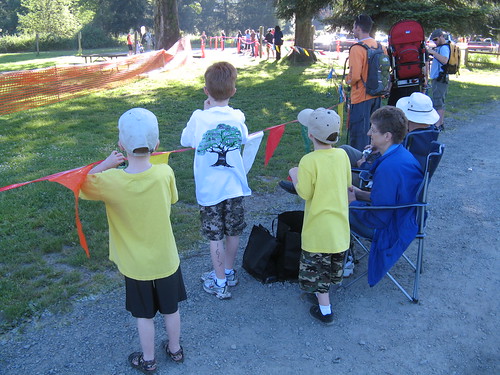
My In-laws (i.e. the Grandparents) wait with my boys at the finish of the 2009 Issaquah Tri

With that in mind...

I live in Sammamish, Washington. My wife's parents live in Tacoma, about 50 miles away (the direct route by car). Living in such close proximity allows for frequent visits to the Grandparents. And each year I tell my wife that I want to ride to their house. This has been going on for 5 years now. Well, I finally found time to do it and with a route that was relatively safe. 

My first idea was the direct route, as calculated by MapMyRide. I tweaked it a bit and came up with this route via Lake Washington Blvd, the Interurban Trail, and lots of city streets through Puyallup and Tacoma to the lovely town of University Place.

Yes, there is a town called Puyallup (pronounced pew-ALL-up). It is home to THE BEST FAIR in the world, the Washington State Fair. Oh, and Fischer Scones. Gotta get me some of those... <drool>

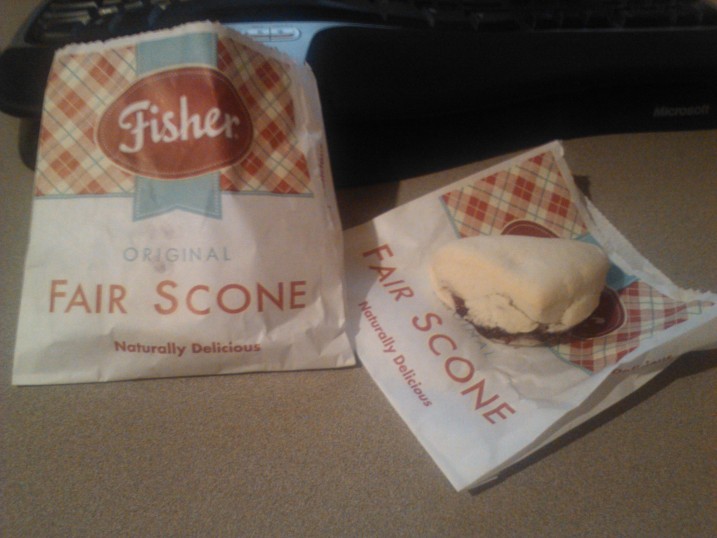
Fisher Scones at the Puyallup Fair...but I digress.

Some facts about this route-

  • Distance: 63.25 miles
  • Elevation gain: 1280'
  • Scenic Factor: 4 out of 10

OK, I totally made up the "scenic factor" but I plan to use it again in the near future. Maybe even in this post. This route does ride along Lake Sammamish and Lake Washington, and has a nice view of Mt. Rainier off in the distance, but it is also VERY suburban in nature. The other thing about this route that bugs me is the last few miles into University Place: the bike lanes are virtually non-existent.

So I considered another option, this one involving a trip to Seattle, a couple of ferries, and an island. Oh, and a little Defiance thrown in for good measure. It came out in 3 sections: Sammamish to Seattle, Vashon Island north-to-south, and Point Defiance to University Place.

Facts about this route-

  • Distance: 48.0 miles
  • Elevation gain: 3021'
  • Scenic Factor: 7 out of 10

This route cuts off nearly 20 miles and includes 2 ferry rides, plus it is on trails, side streets, and rural roads the entire way. Piece of cake, right? What I didn't notice about this route was that the elevation gain is DOUBLE the longer route above.

On ride day (Aug. 2, 2013) I rode into work, then took off from my office in Redmond on my way to Seattle. It figures that the day I plan to do my first big ride since my surgery was also the first day in nearly 2 months that we had any rain. Yes, I'm that good at weather planning. The interesting thing about rain in the Seattle area is that people freak out when it rains. You would think that since it rains a lot in Seattle that people would be used to it. You would be wrong...

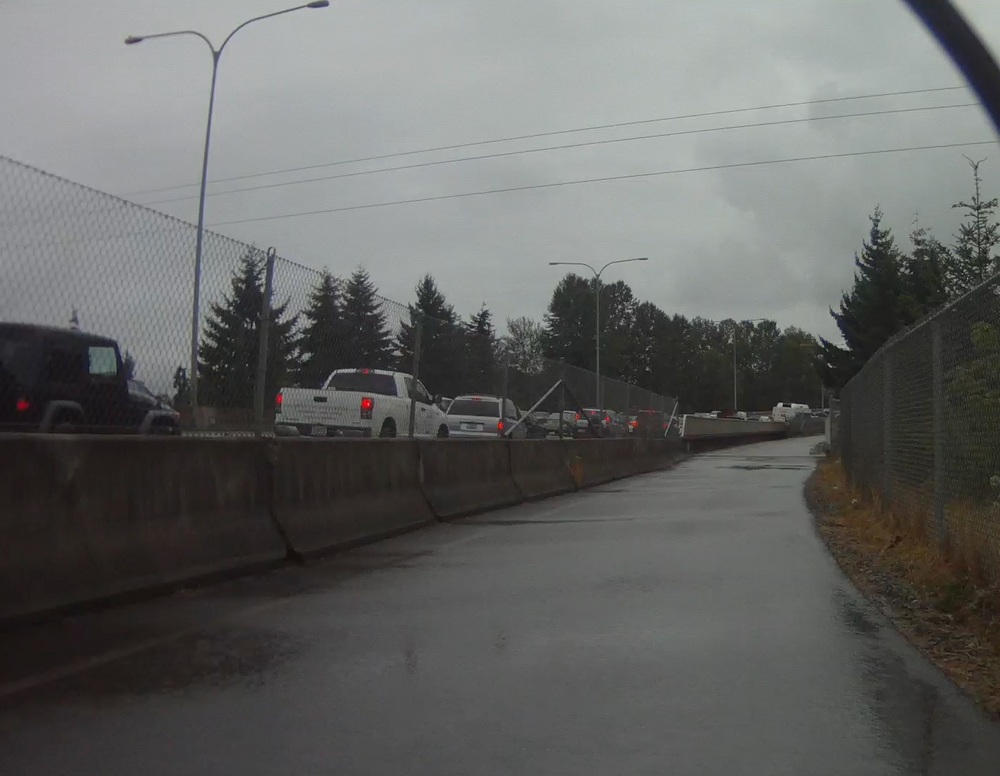
Riding the 520 trail, westbound through Bellevue, passing cars stopped on the freeway.So once again I was glad I planned to do this route on trails and side streets. The other route would have been a lot more dangerous. I still had a few city streets to navigate as I connected to various trails along the way.

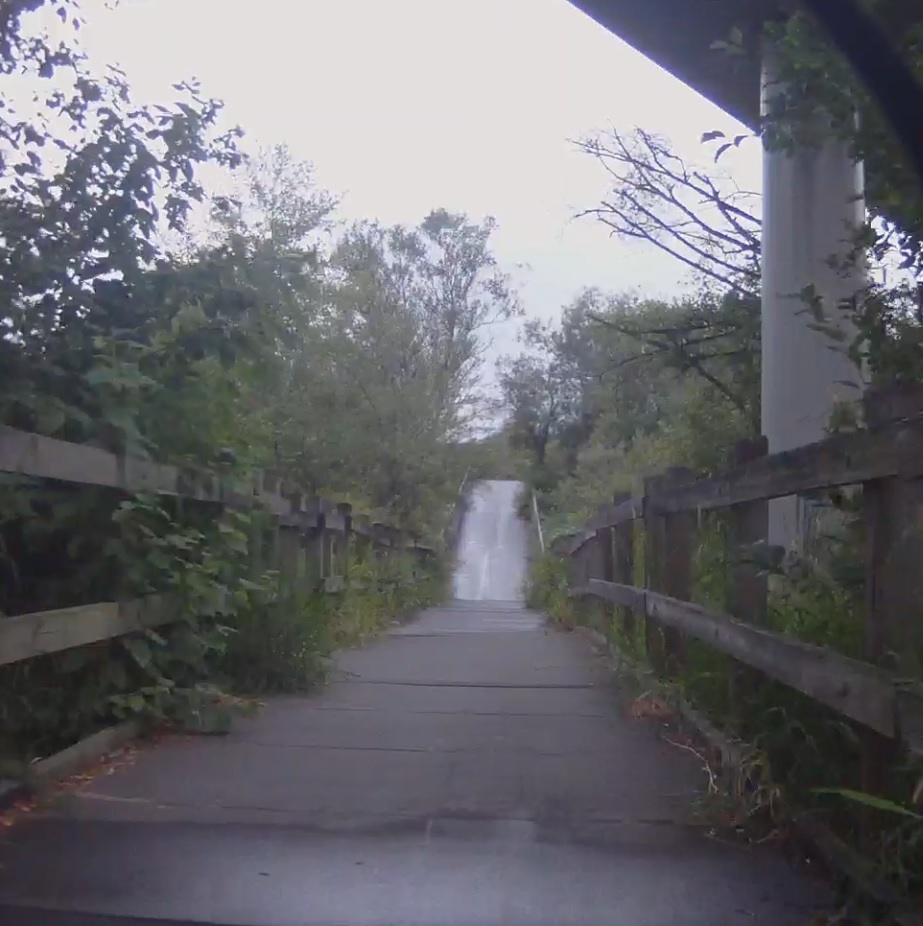
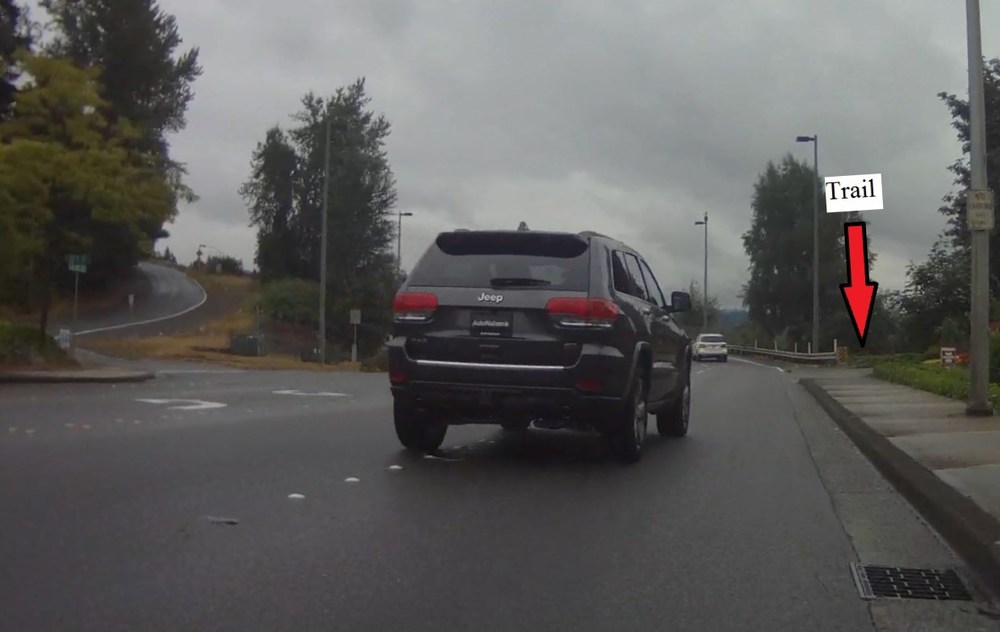
There must be a trail around here somewhere...
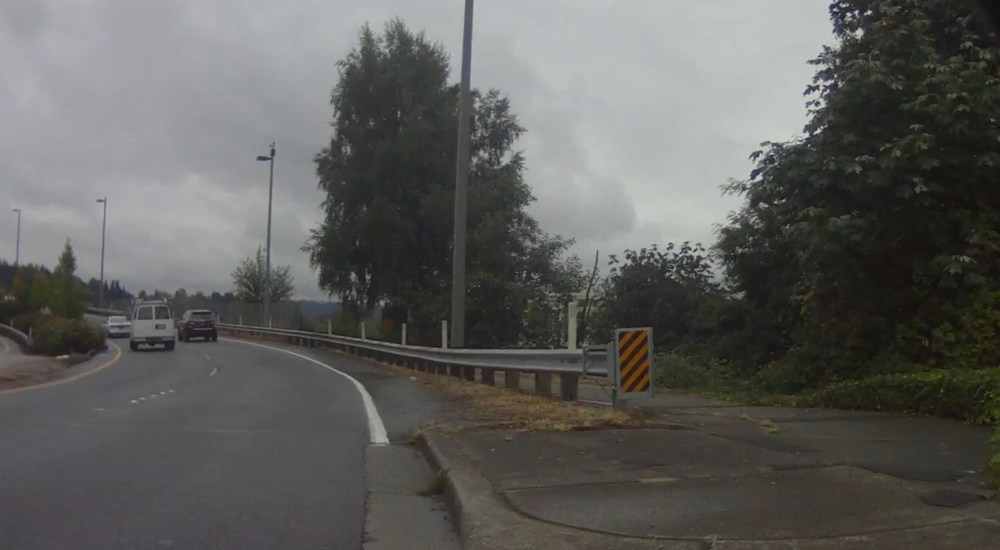
Oh! There it is!

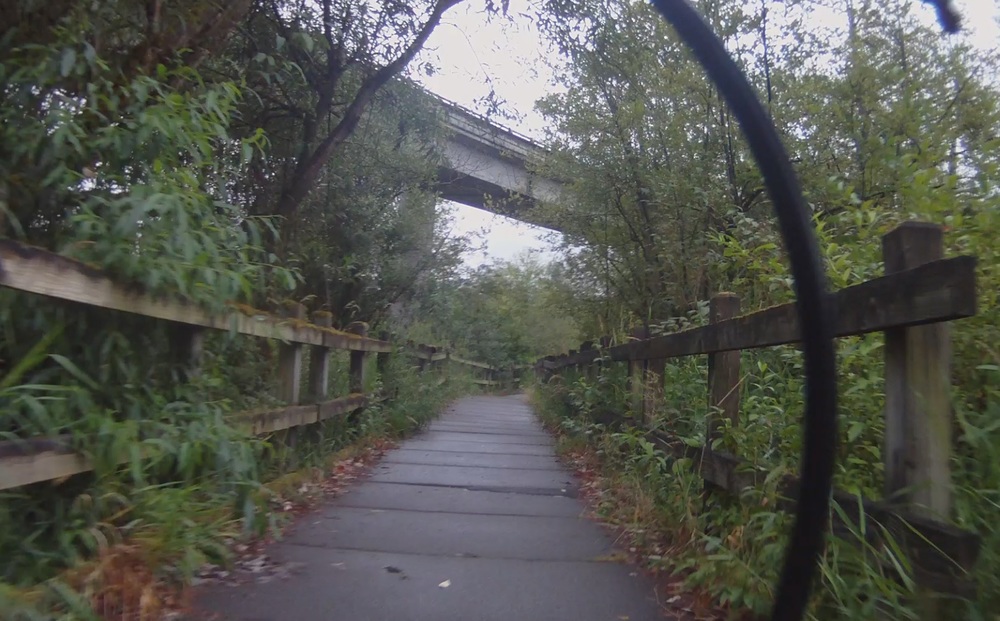
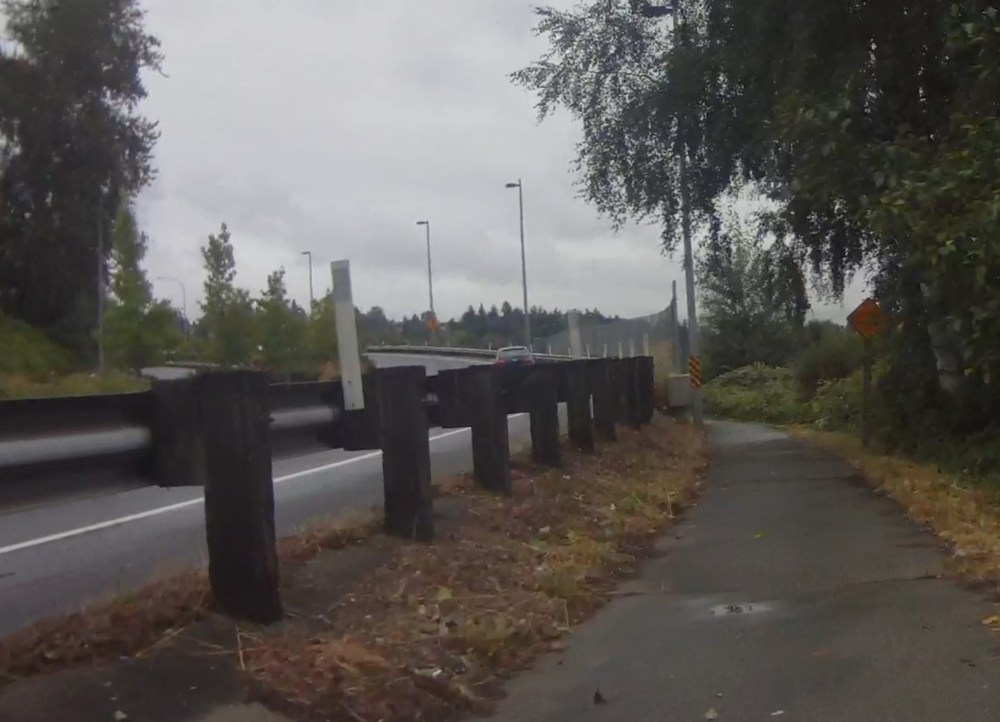
Narrow trail in Bellevue, glad there is no traffic!Through Bellevue, the Mercer Slough, and under I-90.

Bridge over the Mercer Slough in Bellevue, WA

Under Interstate 90 in the Mercer Slough in Bellevue, WA
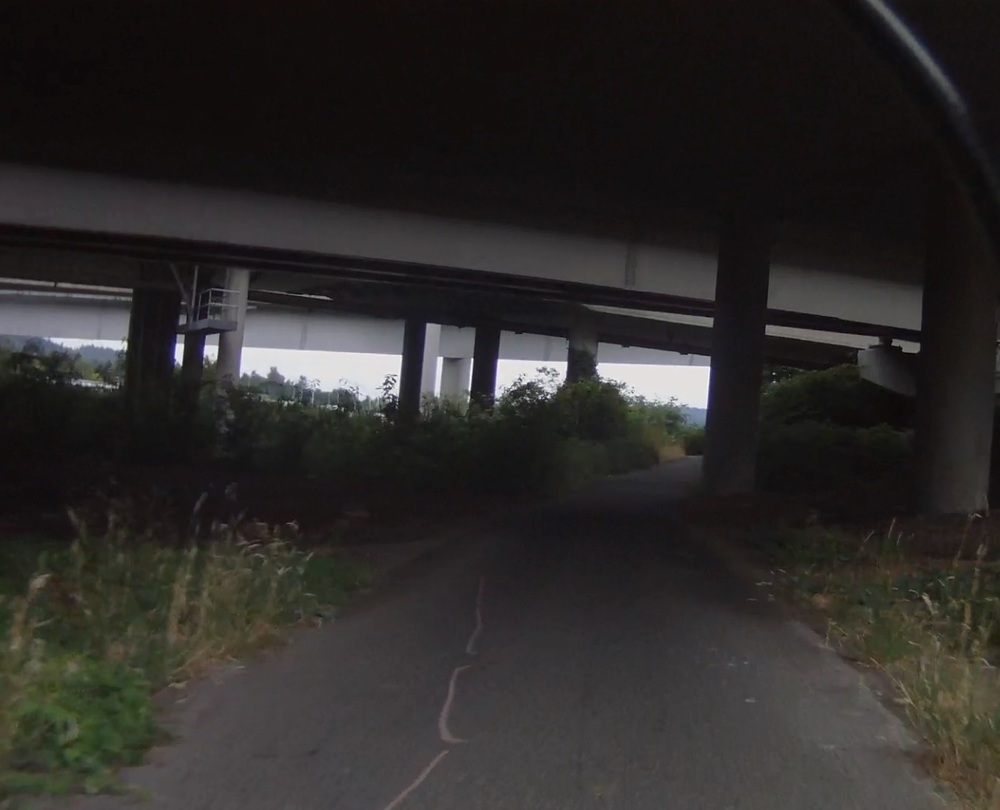
Under Interstate 90 in the Mercer Slough in Bellevue, WAThe I-90 floating bridge across Lake Washington has a bike path on the north side of the bridge, one of the most traveled bike paths in the country. It is a lot of fun to bomb down the hill, get into a tuck, and hammer across the bridge. Unless the wind is blowing in your face and you can barely keep 15 MPH.

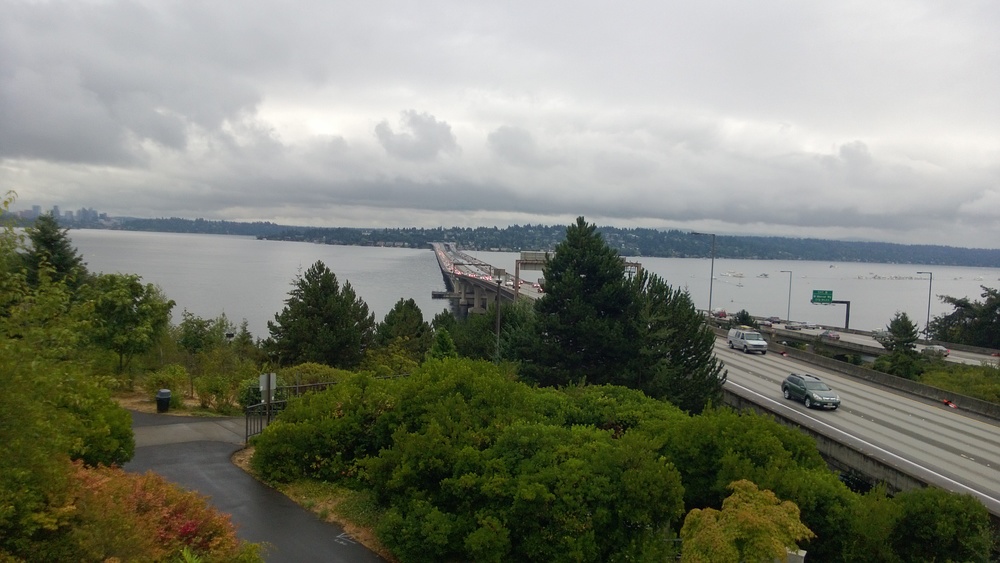
I-90 floating bridge from the Seattle side.Once on the Seattle side you have the choice between a leg-burning climb up and over the hill, with a grade approaching 20% in places, or a quick ride through a 1/4 mile long tunnel. It's not a tough choice given the distance I planned to ride.

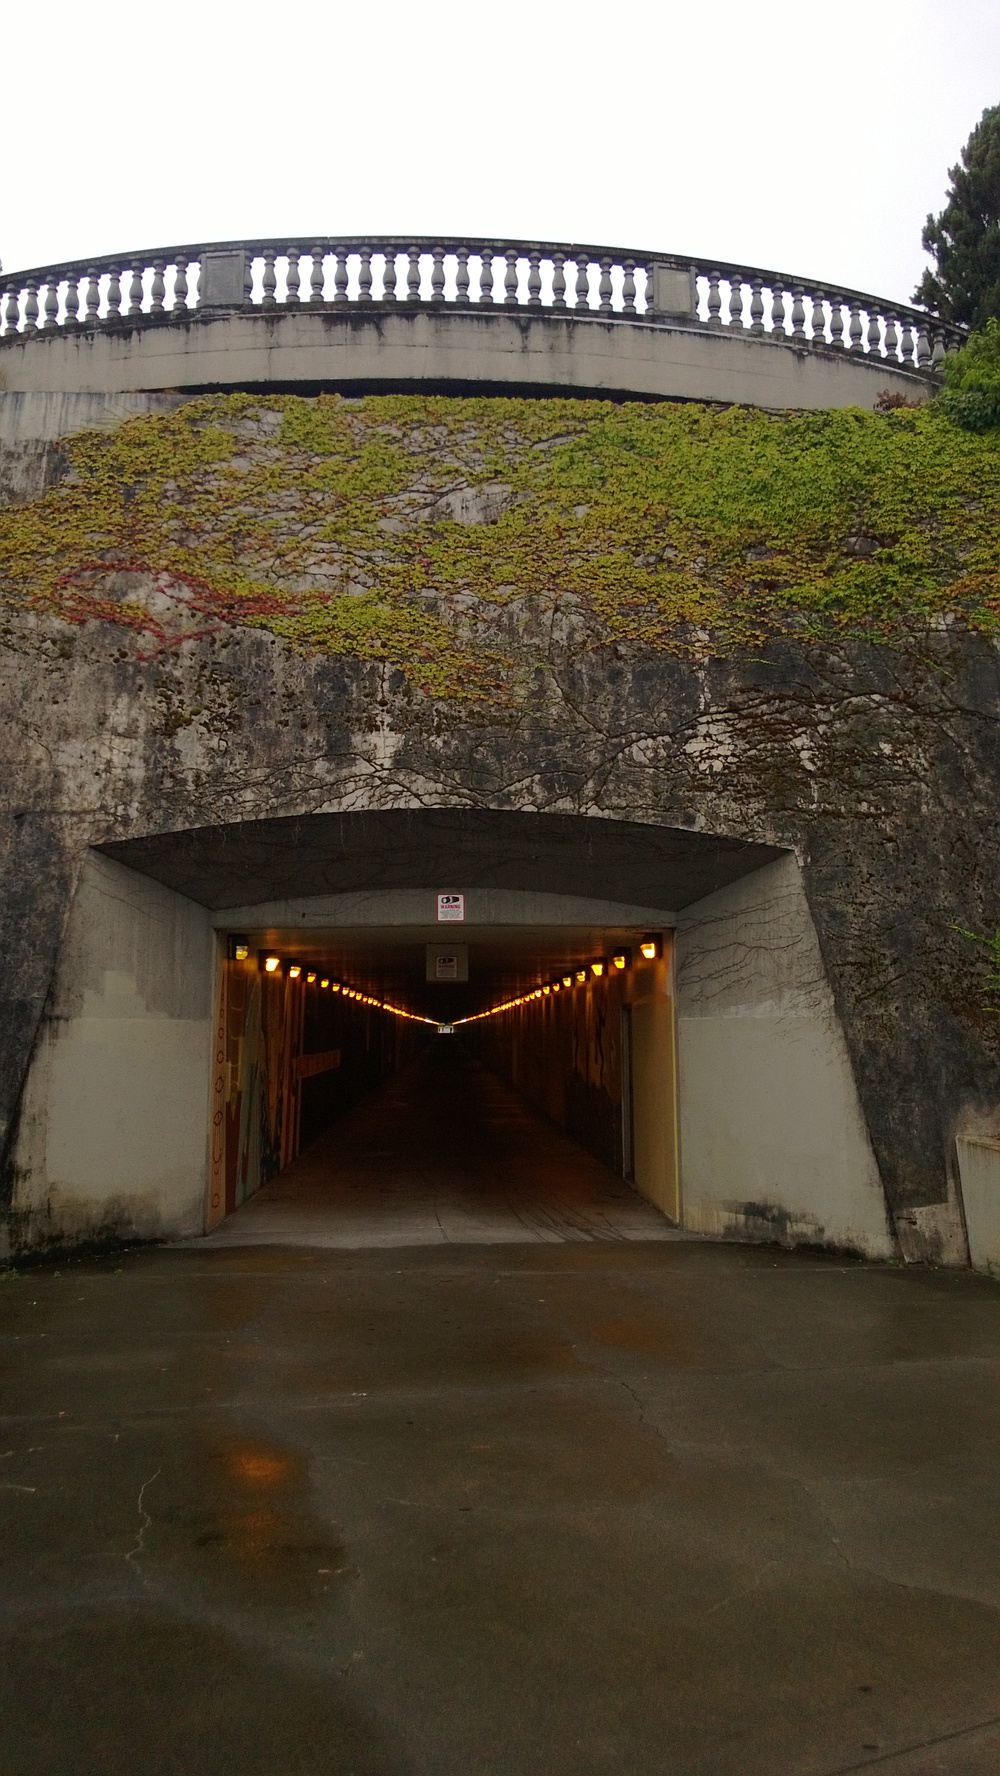
East entrance of the I-90 trail tunnel in Seattle, WAFrom the tunnel I wound my way through bike paths, making only 1 wrong turn, used a couple of side streets, avoided the ever-present road construction, and found my way to the Seattle Ferry Docks at Pier 50. 

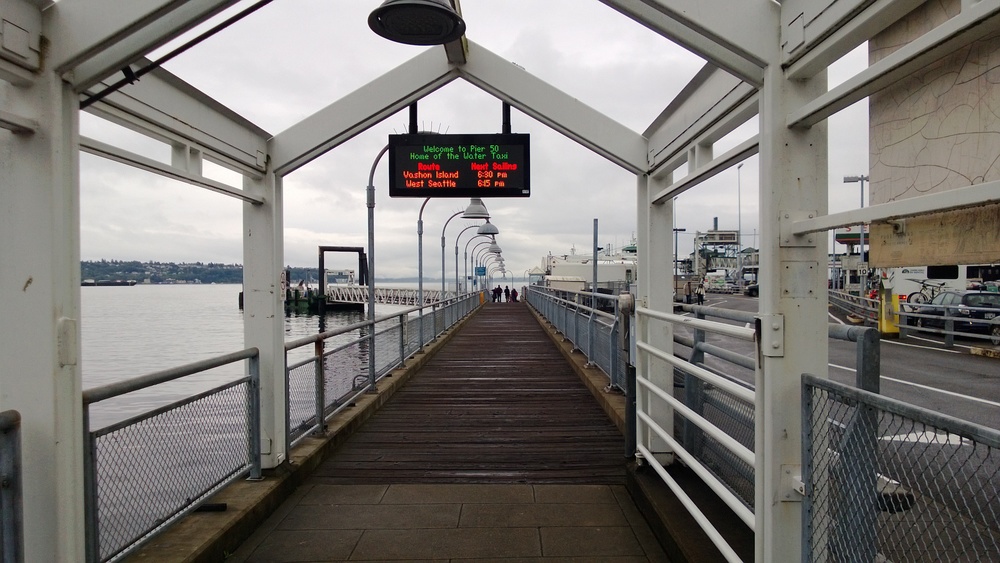
Pier 50 in Seattle, home to the Seattle-Vashon Water TaxiI missed the boat by about 10 minutes so I had the opportunity to relax my legs and take a few pictures.

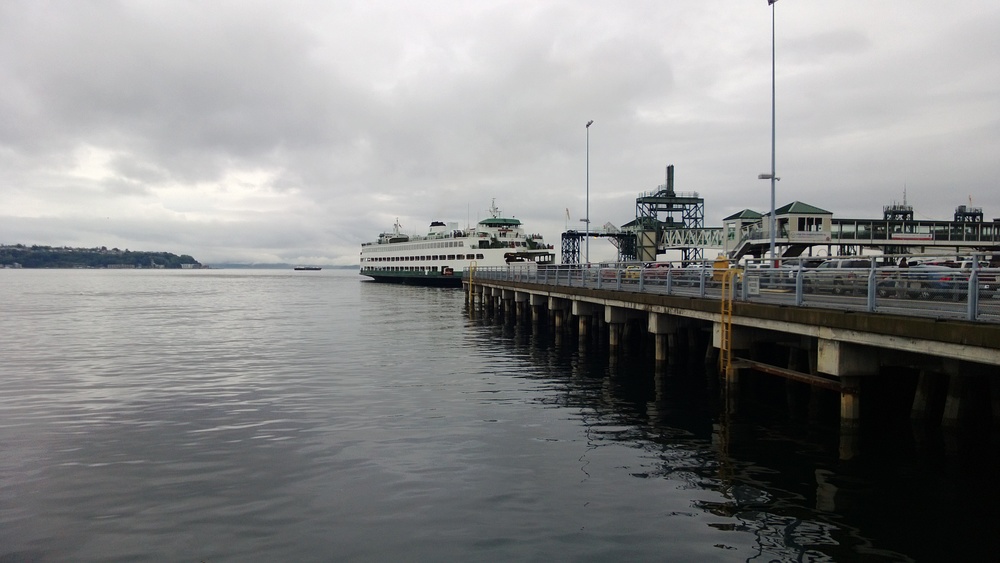
The Seattle-Bremerton ferry at Pier 50 in Seattle
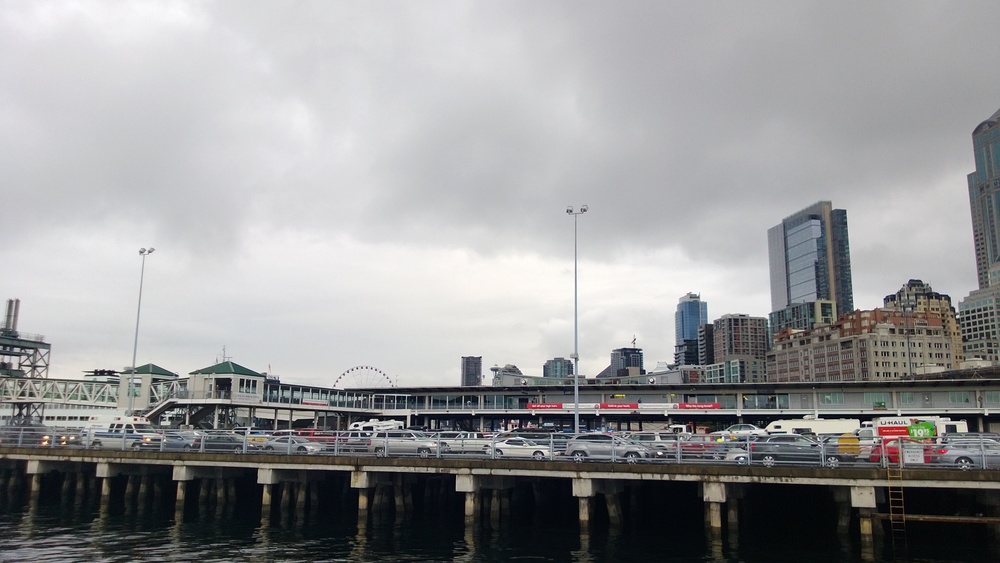
The Seattle skyline in the background with cars waiting at the Seattle ferry terminal.
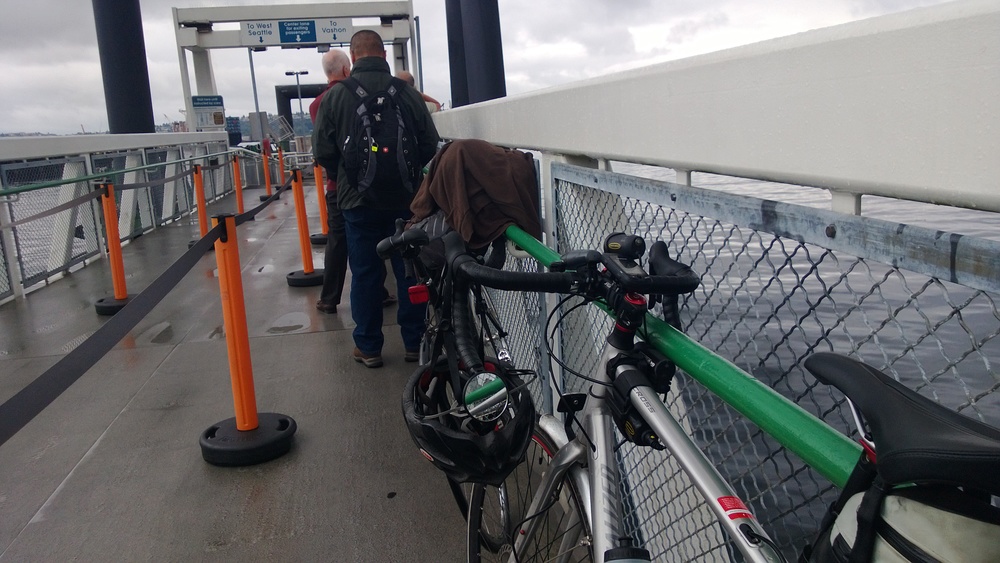
Flynn waits patiently to board the Seattle-Vashon water taxi
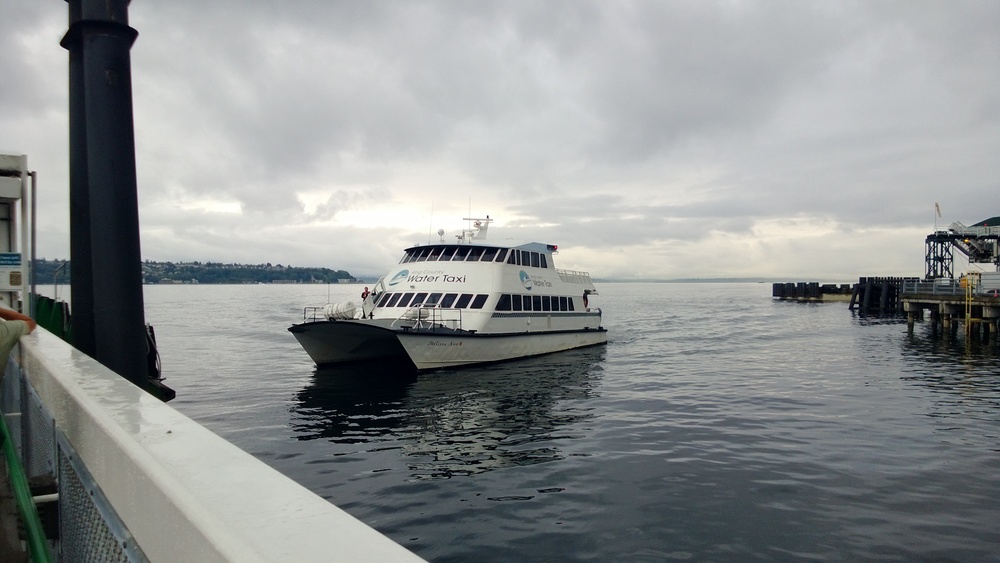
The Seattle-Vashon Water Taxi, operated by King County, arrives at Pier 50 in Seattle.Bike parking inside the water taxi was very easy...

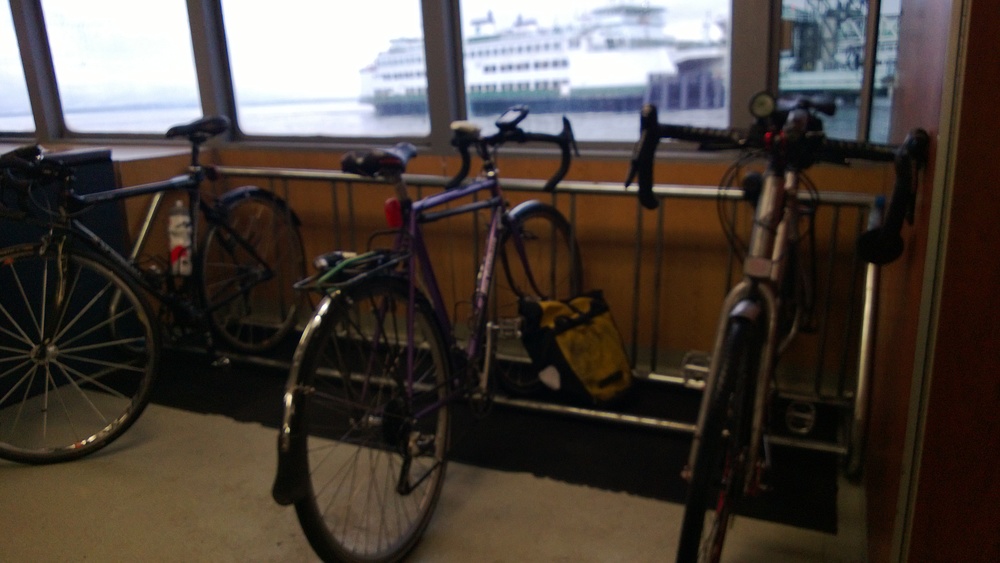
Bike rack in the Seattle-Vashon water taxiThis is where things got interesting. If I had been paying attention to my elevation profile I would have noticed that, once you reach Vashon Island, there is a HUGE climb from the ferry dock up to the main part of the island. I would have a better elevation profile to show off, and may even a Strava segment under my belt, if my Garmin Edge 705 hadn't decided to stop and restart the route in the middle of climbing. Ok, maybe it wasn't "massive" as hills go in this area but it was about a 12% grade for just over a mile, gaining 450' of elevation. 

The island itself simply oozes beauty. I saw a LOT of deer...

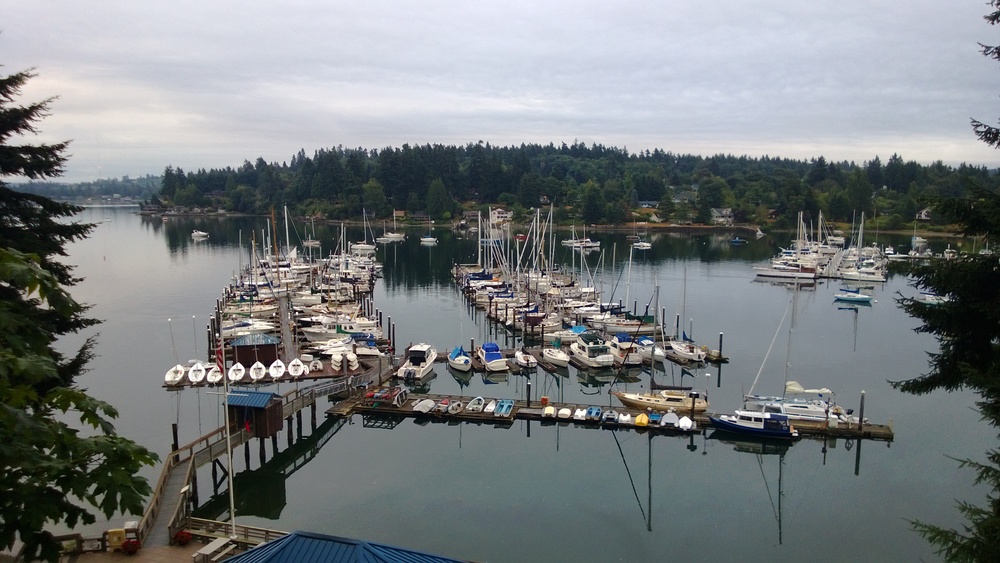
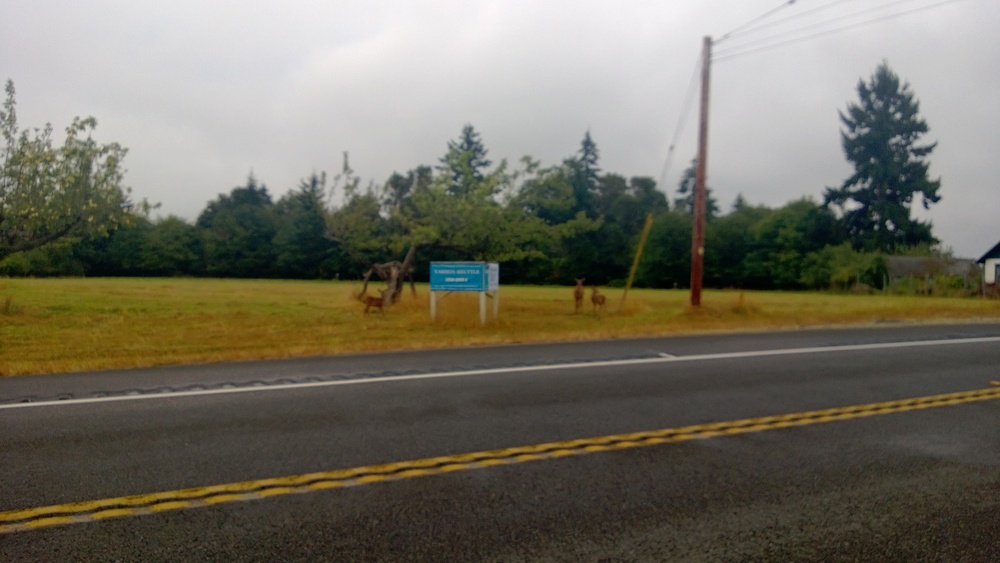
Doe and fawn along Vashon Highway on Vashon Island. My phone decided not to focus on anything of note.Anyone wanting to do some rolling-hills training should definitely consider Vashon. I don't think there was more than 50' of flat pavement anywhere on the entire route: lots of rolling hills, sweeping curves, and great vistas of Puget Sound. And halfway through I realized that Vashon "Island" should really be called "Vashon Islands" since it is really two islands smashed together. Remember that climb coming off the ferry? I got to do it again halfway down the island (450' in 1.3 miles) as I passed by this harbor/marina on the west side.

As I climbed the grade in the middle of the island I came across a "roadside attraction", as the street sign put it, which purveyed information about the history of Vashon Island and its exploration by European mariners.

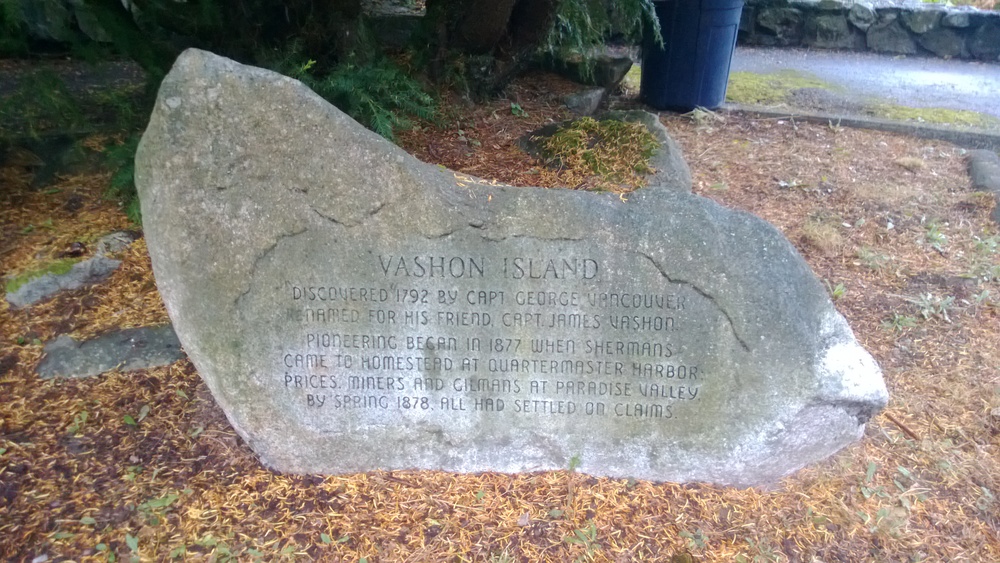
History of Vashon Island in 50 words or less.

Quite possibly the coolest thing about this island is the Vashon Island Bike Tree. I had heard rumors and stories about this bike but nothing does it justice until you see it in person. I was amazed at how small and well-preserved it is. It is actually a kids bike (tires are no more then 12" in diameter). It is definitely worth the trip and very easy to find. Unfortunately someone has removed the handlebars.

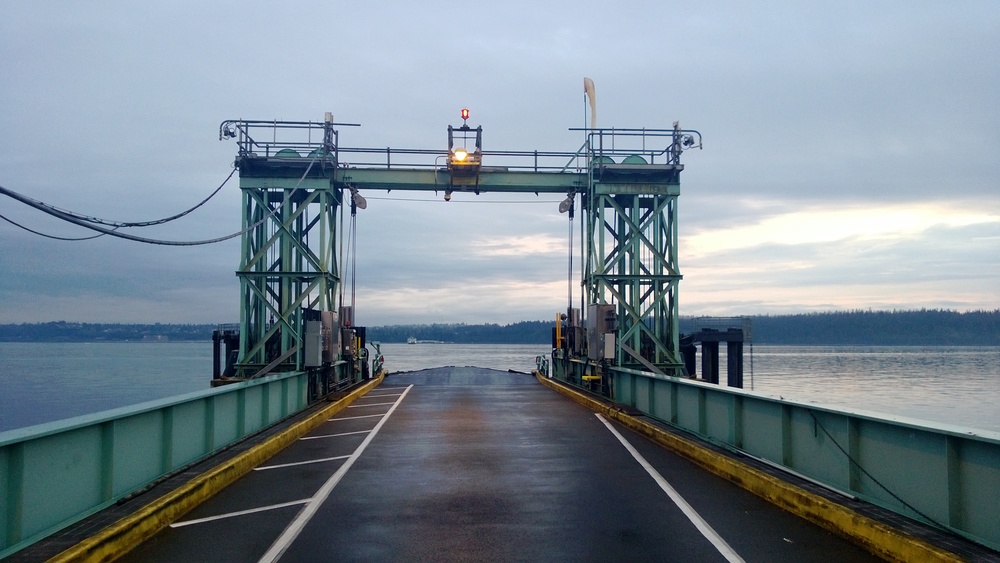
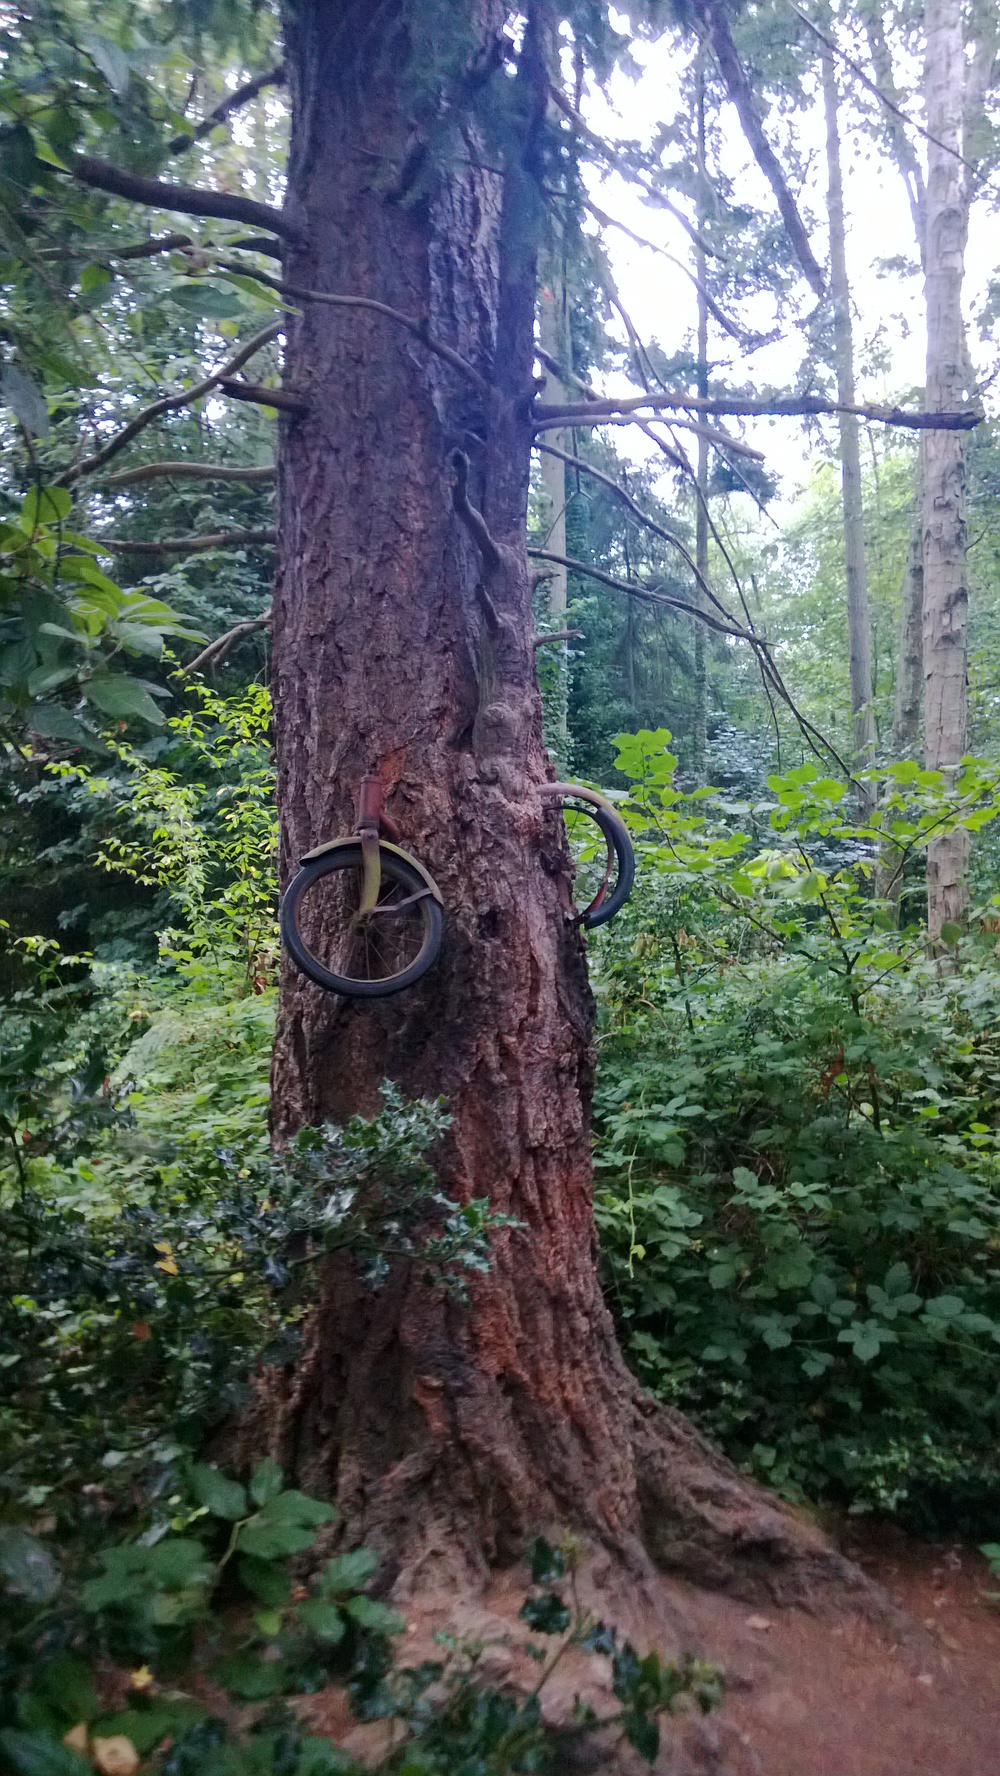
The ever elusive Vashon Island Bike Tree, in all its glory.After more rollers than I care to count I finally hit the down-hill grade that signaled the south end of the island. The Vashon-Point Defiance ferry dock was remarkably small and, to my great surprise, uninhabited.

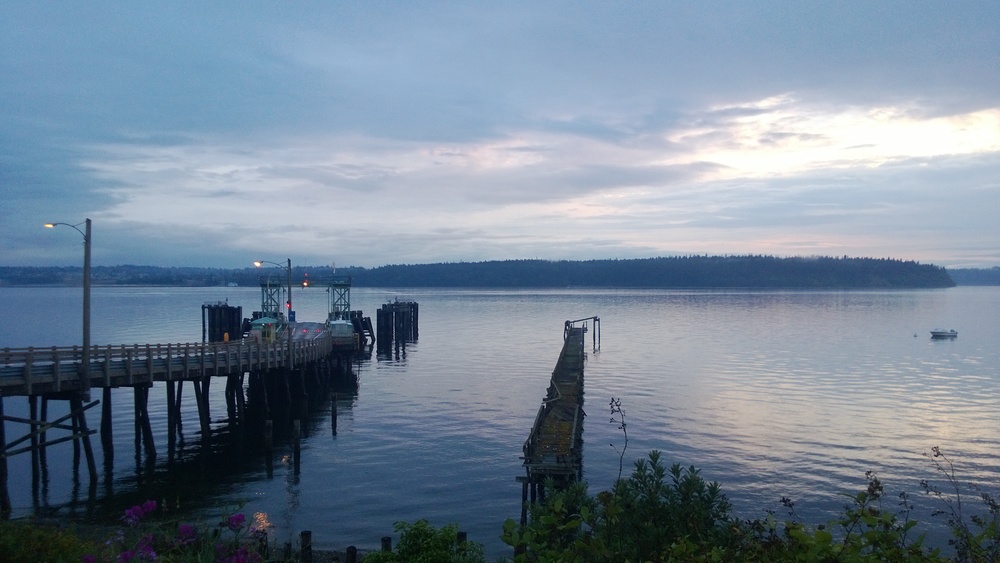
Vashon-Point Defiance Ferry dock with Point Defiance Park in the background.The ferry ride itself isn't that long but it only sails at the top of the hour. This meant I had the chance to rest some more and take a few pictures...

Vashon Ferry dock looking across the water to the Point Defiance ferry dock, with the ferry en route.

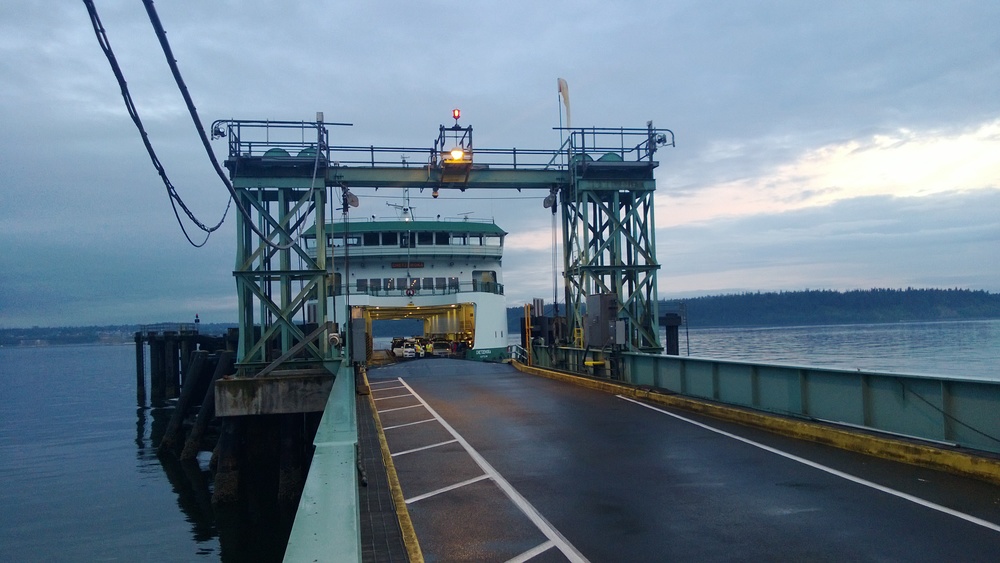
With only a handful of cars on the ferry I started out with my bike simply laying on the floor, until I noticed the bike parking area up above.


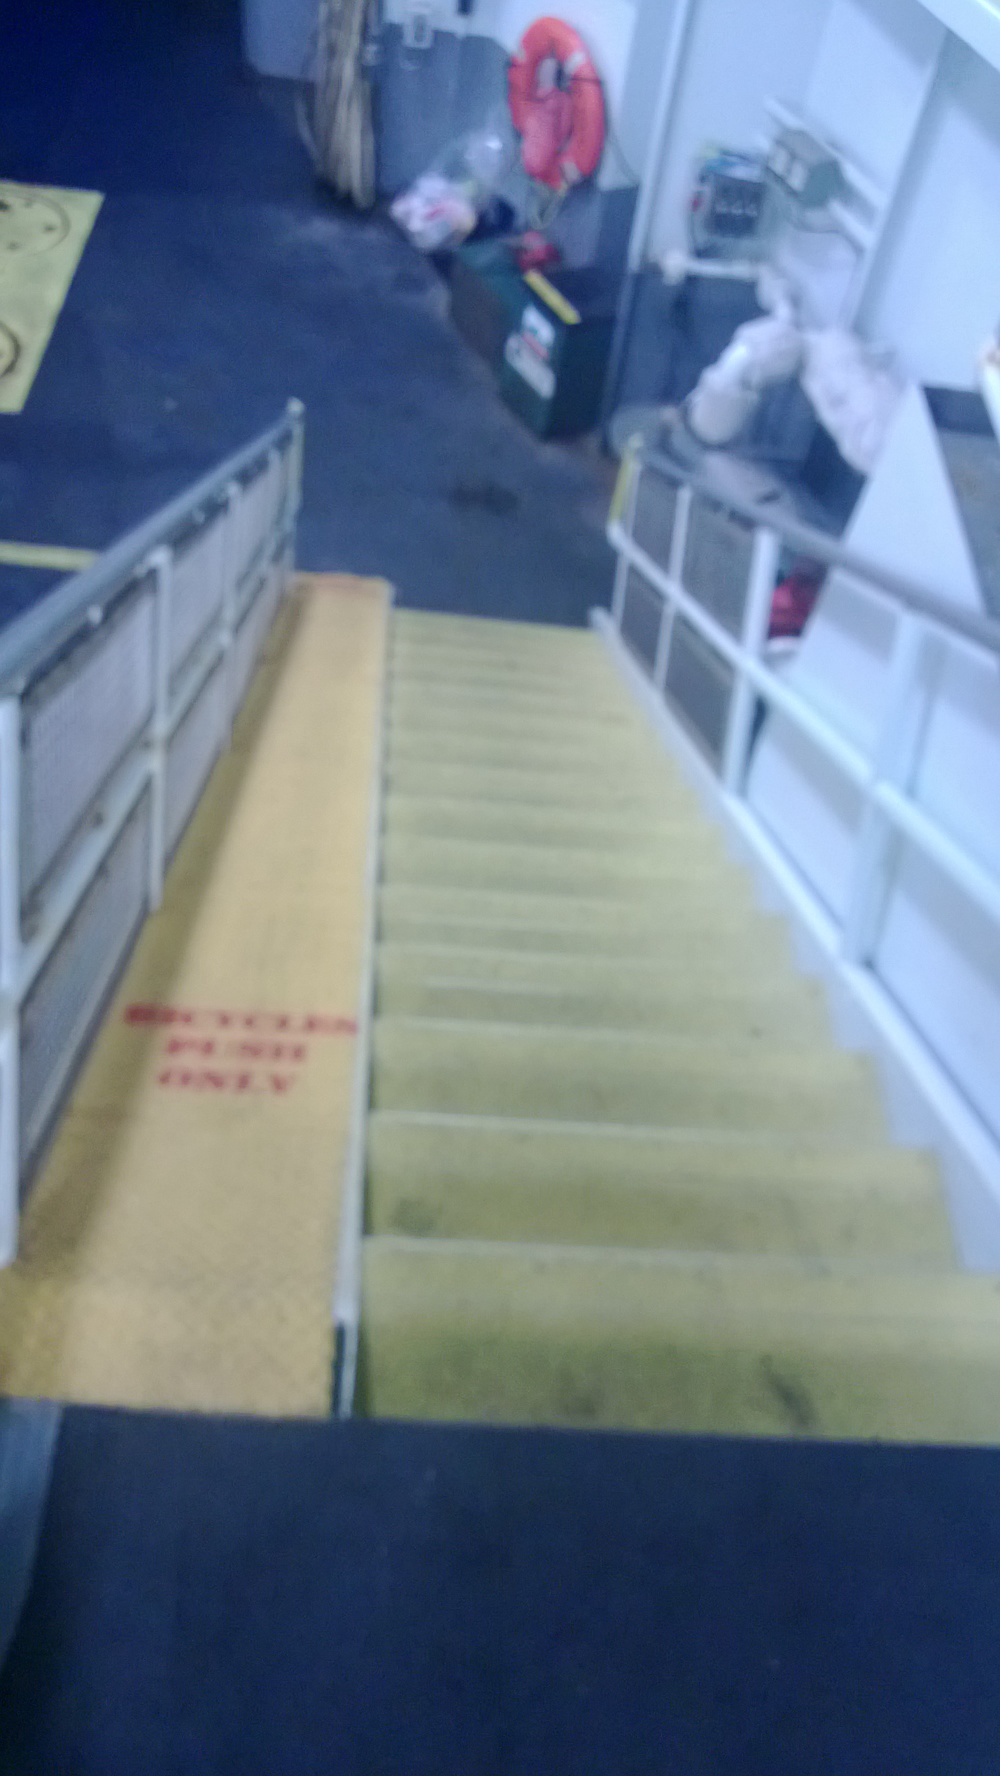
Ramp leading up to the bike parking area.
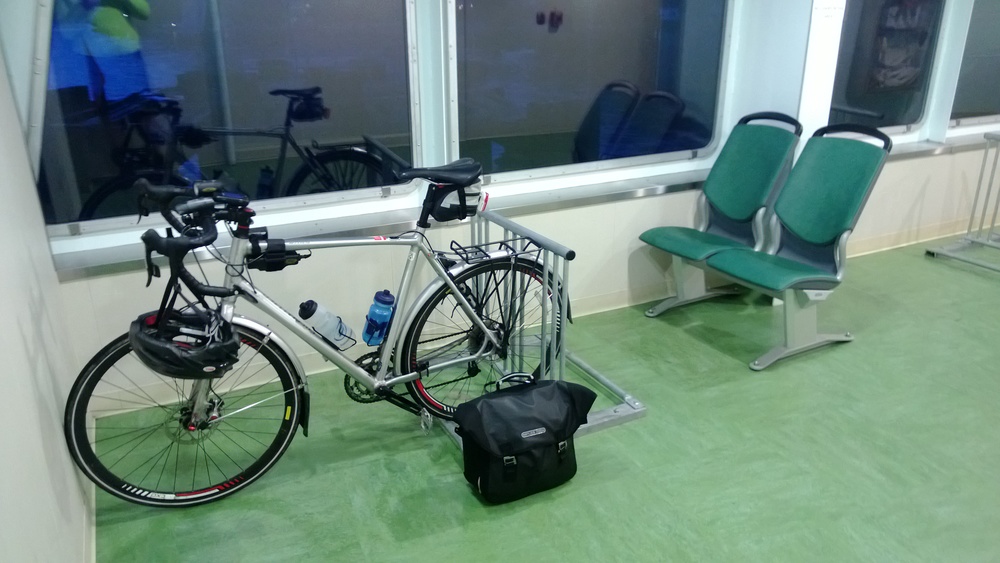
Bike Parking and seating area on the Vashon-Point Defiance Ferry.By the time I left the ferry, dusk was making it impossible to use my cell phone for pictures. 

Riding out of the ferry dock I found yet another big climb of 450' over about a mile (sound familiar?). And, for future reference, when exiting the ferry at Point Defiance, use the sidwalk to make the steep climb out of the ferry area: the road is a very narrow one-lane affair. As I slogged up the hill (in the dark) the cars on the ferry (all 6 of them) backed up behind me. It was a little un-nerving to hear the pickup behind me spin his tires on the wet pavement as he stopped and started again. I exited the ferry at 9:10 pm so there was virtually no pedestrian traffic. The sidewalk would have been a much safer option.

The next 6 miles were some of the slowest I have ever ridden. The hill at the end, although only about 70', felt like 700'. My legs were cooked. Like "chicken falling off the bone" cooked. When I finally arrived at my destination I could barely stand, let alone walk.

Total distance: 46 miles

Total elevation gain: 3003'

Total time: about 5.5 hours

Total riding time: about 3:20:00

GPS routes: Part One, Part Two

Lessons learned: 

  1. Check the elevation profile and know where the climbs are located so you can pace yourself accordingly.
  2. Bring more food or stop for snacks along the way: the small snacks I brought along were not nearly enough foor for a ride of this length and duration. In hind-sight I should have stopped in the small downtown area of Vashon for a break and some food.
  3. Yep, I'm out of shape.

In the end I'm glad to cross another ride off my bucket list. The views were amazing and it was indeed an adventure worth the effort.

Rubber-side down! 

}B^)